Great Gourds!
A dozen tips on how to transition an orange orb into a work of art

You don’t have to sit in a pumpkin patch waiting for The Great Pumpkin like Linus from the comic classic Peanuts, you can carve your own.
The crisp air of autumn is the herald of the harvest, a segue into the time of year when the days are cooler and everything seems ripe for the gathering. It’s the season of rich hues like golds and reds and oranges, when ovens stand at the ready to bake pies fragrant with spices, rich, warm and comforting. When the hearths are lit and glowing, thoughts turn to the mischievous glow of another kind — the kind that flickers behind the carved grin of a pumpkin.
There are, or course, a number of ways to carve a pumpkin. How to do it with the most ease could easily be cause for dispute for the most dedicated gourd gurus, but there are a few great tips that will keep even the most novice carver from butchering their ghoulish delight into a horrifying mess.
To begin, you’ll want to determine the theme and design of your pumpkin. The more detailed the design, the more flat surface area you’ll need. Once you’re clear on what you’re looking for, you can more easily hit the pumpkin patch or the produce aisle to find your perfect pick. Just as you would examine any other piece of produce before you buy it, check the pumpkin over to make sure that you’re not going to run into any soft spots or rotting issues. Look for the firmest in the bunch and inspect the stem to make sure that it’s holding steady.
Remember that timing is everything—carving too early before Halloween will mean that your perfectly executed masterpiece has turned to mush by the big day. Sure, you’ll have a scary-looking pumpkin, but that’s not exactly the kind of scary you’re going for. Then, it’s carving time.
Pumpkin time should get you grinning, and it doesn’t take any magic tricks or spells to get the best looking gourd on the block. It’s easier than you might think, so have some fun and try your hand; get the rest of the family involved and you may find you’ve got a new tradition. Bring on the face making!
Carving Time
- Rinse the dirt from the surface of the pumpkin and then use a durable knife to cut an opening into the top. To make fitting the lid back in place once the pumpkin is carved more easy, cut it in a circular shape with a triangular notch.
- Next, scrape out the insides with a large spoon — preferably one made of stainless steel, as they handle the pumpkin pulp more easily than one made of plastic would.
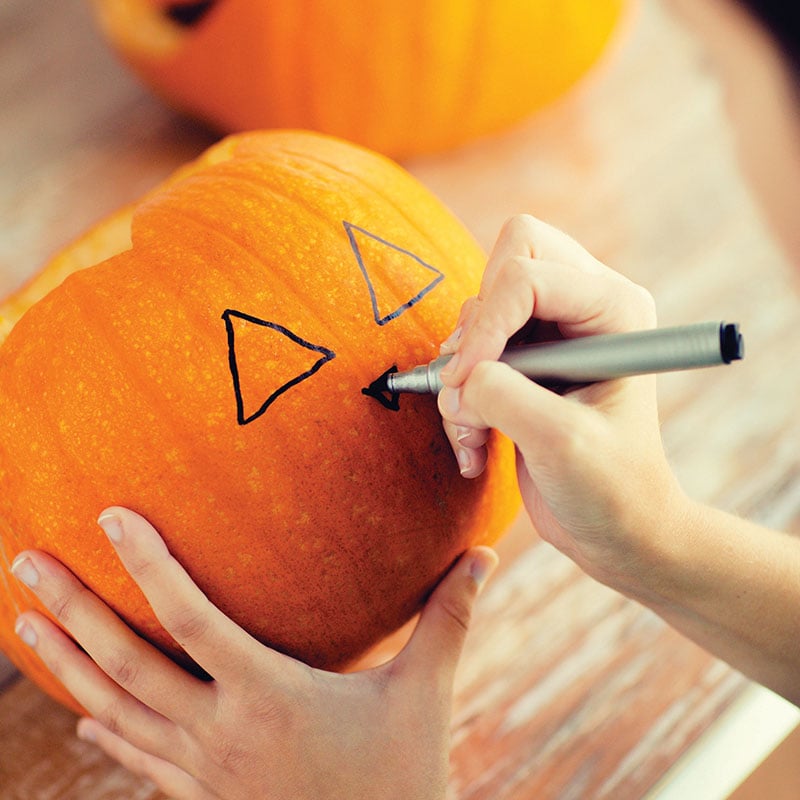
- And now for the fun part: Drawing the design and carving it out. Use a washable marker to draw your pattern so that it can be easily wiped away once the project is finished.
- Cut along those lines with a thin, sharp knife like a filet knife. You’ll be able to make more precise, cleaner cuts, which means that more detailed designs will be easier to execute.
Tips
- Don’t dig into the walls too deeply when you’re carving out the inside of the pumpkin. Leaving the outside structure too thin will make it more fragile.
- Save your seeds to bake in the oven as a tasty, nutritious snack or plant them in your own edible garden.
- Keep your pumpkin looking creepy longer by spraying the carved areas with an organic solution called Wilt-pruf, which will naturally help it retain moisture and keep it from becoming discolored or shriveled looking. Can’t find any at the store? Petroleum jelly works just as well to seal in the moisture.
- Get creative with the carving and cutting tools that you use. An apple corer is great for making perfectly round holes, and metal cookie cutters can score the surface to serve as a cutting guide if you tap it a few times with a mallet.
- Keep things clean by putting the pumpkin in the sink before you start removing the pulp.
- Use your imagination! Try something other than the classic Jack-O-Lantern face; think about elegant swirls or city scenes. If you’re looking for inspiration, the Internet has great patterns to download, so hit the web.